Scene list
How the scene list orders objects in areas and unions, the rule that an object changes only the objects above it, and the Health and Imports tabs.Use this when: shapes do not combine as expected, you need to reorder or regroup objects, or the scene is slow or out of memory.
Don't use this for: moving the camera or setting Goop and Form values. Read Navigation and layout, Shapes and Goop, and Form and Mirror.
The scene list is on the left of the editor. It has two tabs, List and Health. An Imports tab appears when the project has imported files.
The List tab
The List tab shows the objects in your scene under Objects. It can also show Lights and Cameras sections.
Add objects(+) opens the objects menu.ExpandandCollapseopen or close every area and union at once.- Drag an object to reorder it or to move it into another area or union.
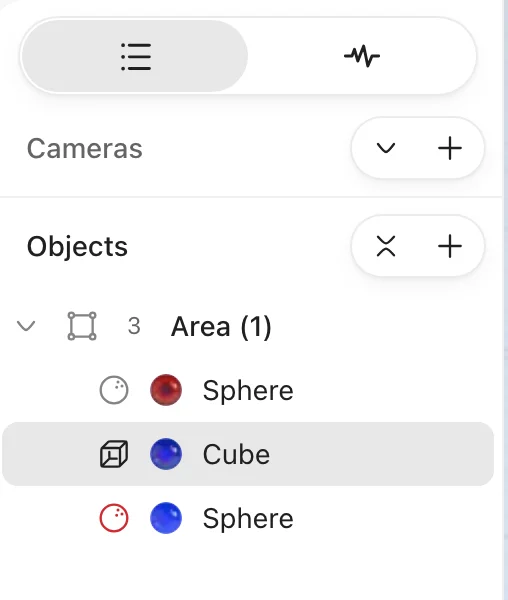
The List tab: an area with three objects. The second sphere is Negative.
Areas and unions
Objects live in two kinds of container:
- Area: the top-level container. Every object must be inside an area. Stickers are the only exception. If you drag an object outside an area, Womp makes a new area for it. Objects in different areas do not blend, cut or stain each other. Each area has its own
Resolution. - Union: a container inside an area. It combines its objects so they act as one object. You can set
FormandGoopon the whole union, and you can put unions inside other unions. The union'sGoopsets how the union blends with other objects. TheGoopof each object inside it sets how the objects inside blend with each other.
An area cannot have Form or Goop. The nesting depth has a limit. A Pro user in a Pro project can nest deeper.
| Action | How |
|---|---|
| Union selection | Shift + M |
| Break union | ⌘/Ctrl + Shift + G |
| Group selection | ⌘/Ctrl + G (groups objects so you can select them together) |
| Break group | ⌘/Ctrl + Shift + G |
| Move outside | Right-click menu. Takes an object out of its container. |
The order rule
An object changes only the objects above it in the same area or union. This applies to Goop and to every Form setting. Unions follow the same rule.
- Put the object that cuts, stains or masks below the objects it should change.
- The first object in an area or union cannot be
Negative,StainorIntersect, and cannot goop. There is nothing above it to change.
Change the order with the right-click menu or the keys:
| Action | Shortcut |
|---|---|
Move up | ⌘/Ctrl + ] |
Move down | ⌘/Ctrl + [ |
Send to top | ] |
Send to bottom | [ |
Right-click menu
Right-click an object in the list to open its menu: Lock or Unlock, Hide or Show, Copy, Paste, Duplicate, Rename, the Form settings, Replace with, Flip, the order actions, Move outside and Delete.
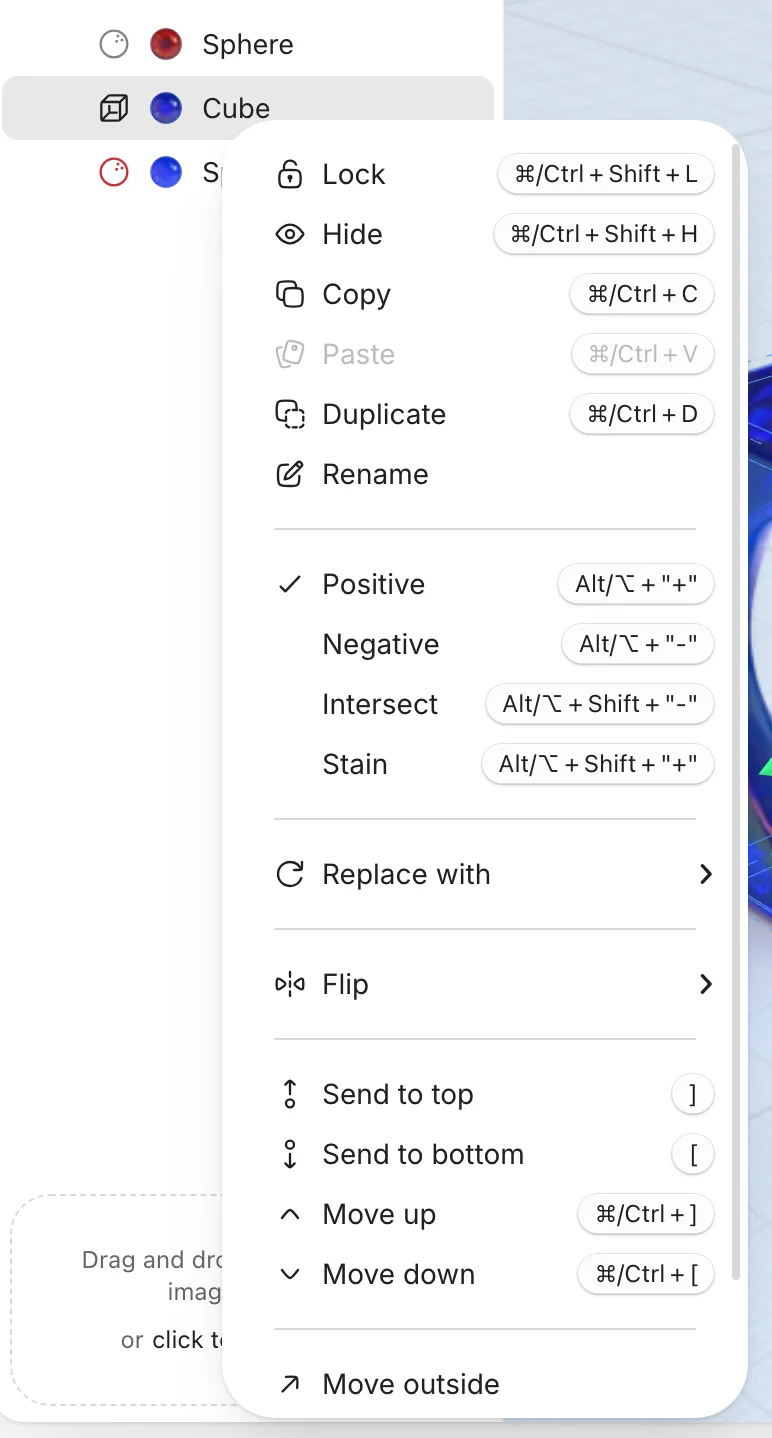
The right-click menu of an object in the list, with the shortcut for each action.
The Health tab
The Health tab shows how heavy your scene is.
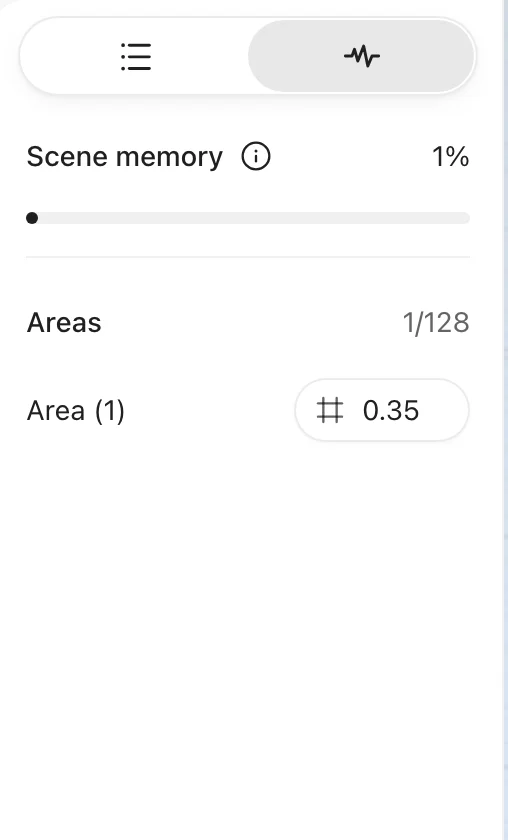
The Health tab for a small scene: scene memory, the number of areas against the limit, and each area's resolution.
Scene memory: a bar with a percentage. High usage slows the editor. When it is high, Womp shows a warning and aReduce resolutionmenu withReduce by 25%andReduce by 50%.Total areas: how many areas you have, against the limit. The limit is 64 areas. In a Pro project with a Pro plan it is 128.- Each area: its
Resolutionslider and how many primitives it holds against its limit.
If scene memory gets critical, Womp shows "Editing is disabled" until you lower resolution. Click Go to health to fix it.
Resolution is like 3D pixels. Higher resolution shows more detail but uses more scene memory. If an area is too heavy, it shows a warning: reduce its resolution until the warning goes away. You can also set Resolution in the inspector when you select an area.
The Imports tab
The Imports tab lists the files you imported into the project.
Import storage: how much of the project's import storage you use. Pro doubles the storage and unlocks Sticker and SVG imports.- For each file:
Select all copies in scene,Add a copy to the scene, andDelete the file and all copies.
To import, drop a 3D object, image or SVG on the drop area below the list ("Drag and drop any 3D object, image, or SVG"), or click to browse.
Use instead
- Wrong move: putting a
Negativeobject above the shape it should cut. Why: an object changes only the objects above it in the same area or union. Right move: drag theNegativeobject below the shape, or useSend to bottom([). - Wrong move: putting many objects of very different sizes in one area. Why: the area's resolution is shared by all its objects, so small details can lose quality. Right move: split the model into more areas, and check the
Healthtab. - Wrong move: raising every area's
Resolutionto fix a blurry part. Why: high resolution uses scene memory and can make the project unstable. Right move: raise only the area that needs it, and watchScene memory.
Last checked: 2026-11-10. Womp version: Womp web app, November 2026.