Docs
Get started
Make
Print
Credits and plans
Agents and developers
Account and help
Changelog
Navigation and layout
How to move the camera, use the view cube, switch views, and find the scene list and the inspector.Use this when: you need to move around the canvas, find a lost model, or explain where a panel is.
Don't use this for: adding or combining shapes. Read Shapes and Goop, and Form and Mirror.
The editor layout
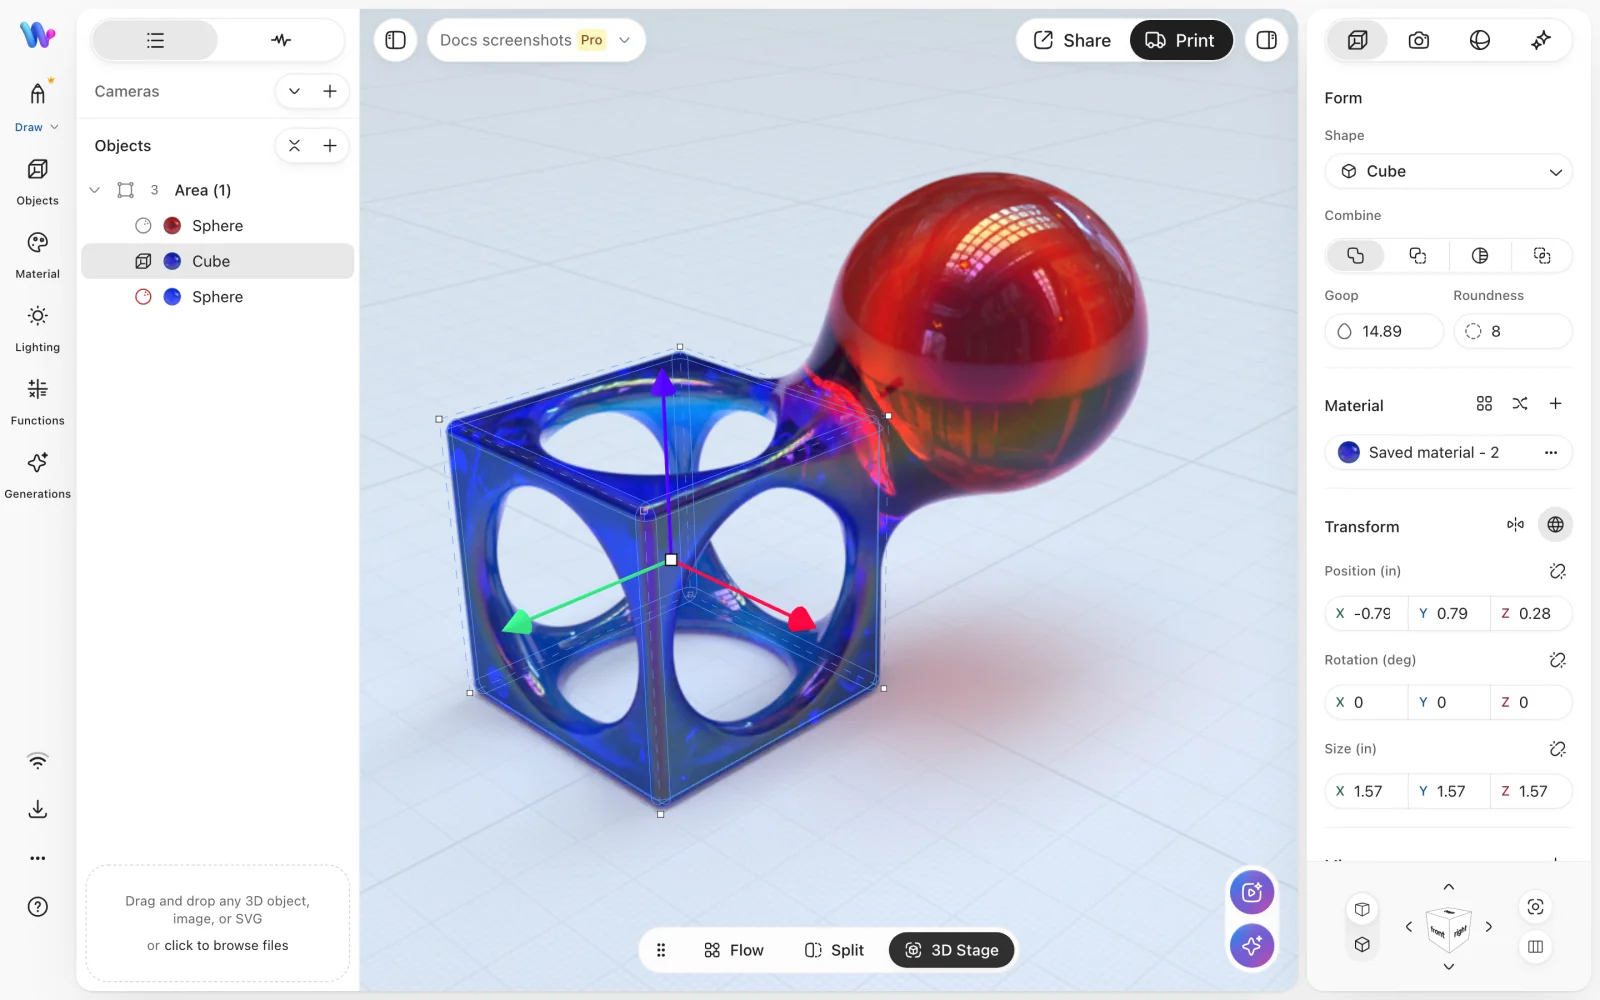
The editor: scene list (left), canvas (centre), inspector (right) and view switcher (bottom).
- Scene list (left): every object, light and camera in the project. The tabs at the top are
ListandHealth. AnImportstab appears when the project has imported files. See Scene list. - Canvas (centre): the 3D view of your model.
- Inspector (right): settings for what you selected. Its tabs are
Object,Camera,SceneandSpark. TheObjecttab is available only when you select an object. Open or close the inspector with theShow inspectorandHide inspectorbutton. - View switcher (bottom):
Flow,Splitand3D Stage.
Views
| View | What it shows | Shortcut |
|---|---|---|
Flow | The node editor. See Flow (Nodes). | Alt/⌥ + 1 |
Split | Flow and the 3D Stage side by side. | Alt/⌥ + 2 |
3D Stage | The 3D canvas only. | Alt/⌥ + 3 |
Move the camera with the mouse
| Action | Mouse |
|---|---|
| Rotate (orbit) | Hold the left button and drag. |
| Pan | Hold the right button and drag. You can also hold Shift, Ctrl or ⌘ and drag with the left button. |
| Zoom | Turn the scroll wheel, or hold the middle button and drag. |
On a touch screen, drag one finger to rotate. Use two fingers to zoom and pan.
The view cube and its buttons
The view cube shows the direction you look from. It sits on the right side of the editor.
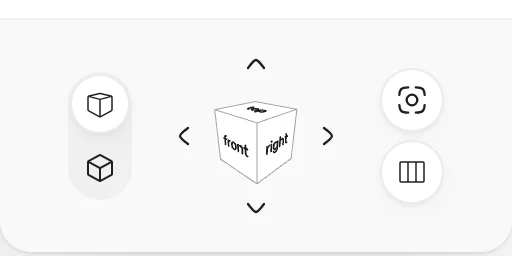
The view cube with its arrow, projection, Center and Magnet buttons.
- Snap to a side: click a face of the cube to look straight at that side.
- Step around: use the arrow buttons
Rotate left,Rotate right,Rotate upandRotate down. - Projection: choose
Perspective(things far away look smaller) orOrthographic(no perspective, easier to line things up). This changes only the view, not the model. Center: frames the view again. The shortcut isC.Magnet: turns snapping on or off. The shortcut is⌘/Ctrl + '.
You can also step the view with the keyboard: Shift + 3 (left), Shift + 4 (right), Shift + 5 (top) and Shift + 6 (bottom). Shift + G shows or hides the grid.
Select objects
- Click an object on the canvas or in the scene list to select it.
- Hold
Shift,Ctrlor⌘and click to add more objects to the selection. ⌘/Ctrl + Aselects all objects.
Use instead
- Wrong move: rotating and zooming to search for a model that went out of view. Why: the camera can drift far from the model. Right move: press
C(Center), or click a face of the view cube. - Wrong move: lining up parts in
Perspective. Why: perspective makes far parts look smaller, so edges that look level may not be. Right move: switch toOrthographicand look from one side of the view cube. - Wrong move: looking for the
Objecttab with nothing selected. Why: the tab is available only when an object is selected. Right move: select an object first, then openObjectin the inspector.
Last checked: 2026-11-10. Womp version: Womp web app, November 2026.