Lights and camera
Add lights, choose the environment light and backdrop, set up cameras, background blur and frames, and switch to Lightweight view.Use this when: you want to light a scene, compose a shot, blur the background, or make the editor faster on a heavy scene.
Don't use this for: animating the camera or exporting video. Read Animation and video.
Add lights
Click Lighting in the left toolbar, or click Add lights in the Lights section of the scene list. There are three types:
| Light | What it does |
|---|---|
Rectangular | Shines in one direction, like a softbox. |
Spherical | Shines in all directions, like a bulb. Good for fill light. |
Dome | Lights the whole scene, like the sun. |
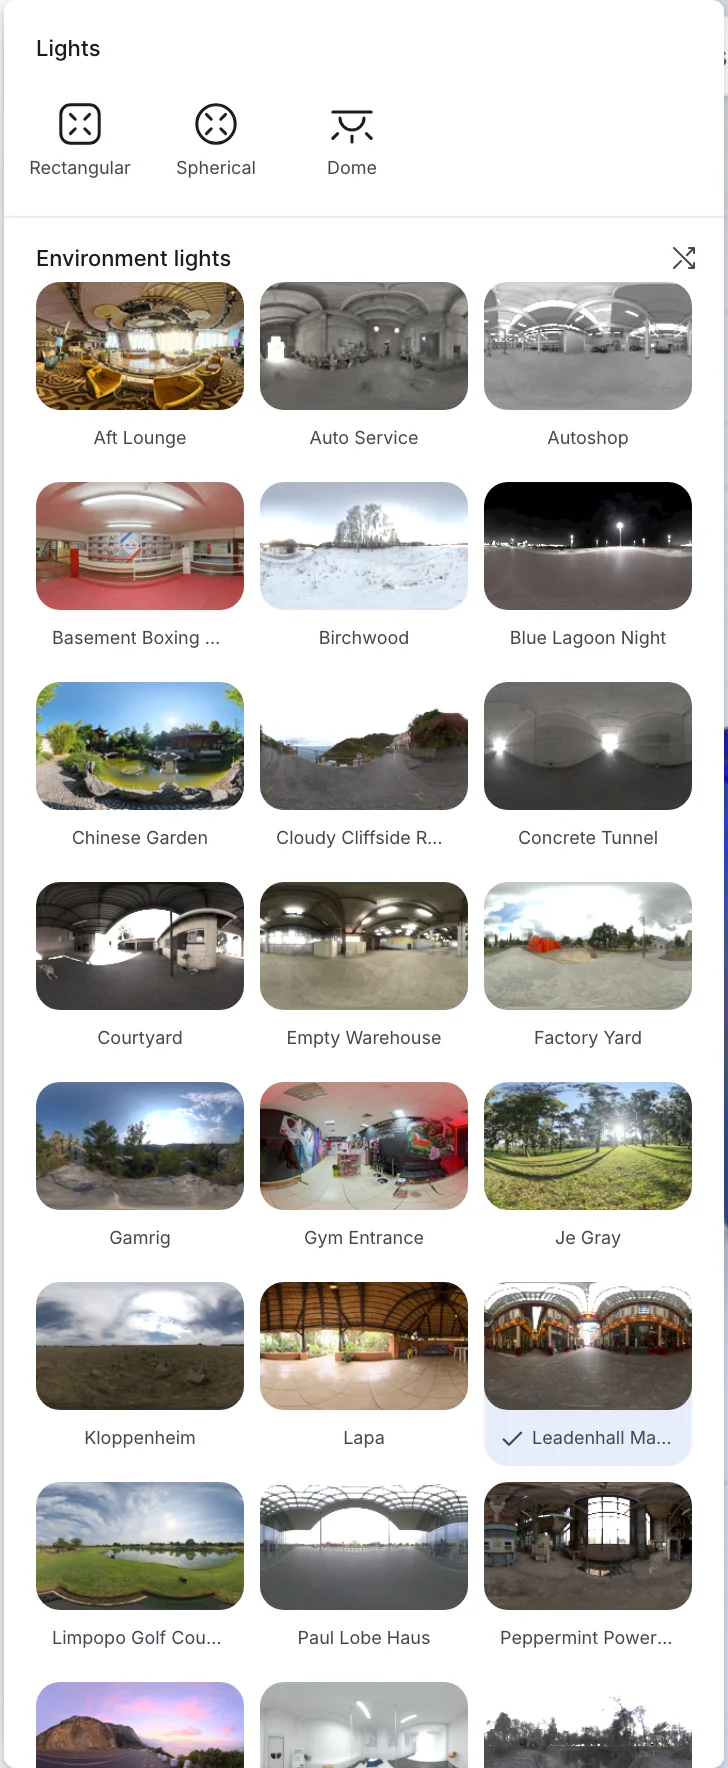
The Lighting menu: the three light types, then the environment lights. The check marks the current one.
A project can have at most 15 lights. When you reach the limit, Womp says "Can't add more lights."
Light settings
Select a light to set:
Position, andRotation(not on spherical lights).Areaon a rectangular light, orRadiuson a spherical light. A bigger light gives softer shadows.Color.Luminance: 0 to 100. A light at 0 gives no light.
Advanced Light Properties
Open Functions in the left toolbar and choose Advanced Light Properties (marked experimental, current v2 projects only). Select one rectangular or spherical light, then:
Light Pattern: clickSelect Imageto shape how the light is projected.Clearremoves the image.Beam Focus: 0 to 100%. Focuses the beam of the light.
Environment light
The environment light lights the scene from all sides and shows in reflections. With nothing selected, the right panel shows the scene settings:
Environmental Light: click the preview, thenChange, to pick another one. TheLightingmenu also lists them underEnvironment lights.Lightmap rotation: 0 to 360. Turns the light around the scene.Luminance: 0 to 100. Sets how bright the environment light is.Shuffle Lightmappicks a random one. It is also in the bottom bar.
Backdrop
Backdrop is the first scene setting. It sets the background color behind the model. It does not change lights or materials.
- Pick a color in the color picker.
- Under
Saved Backdrops,+adds a new white swatch you can recolor and reuse in this project. Shuffle Backdroppicks a random color.
Show Grid turns the floor grid on and off.
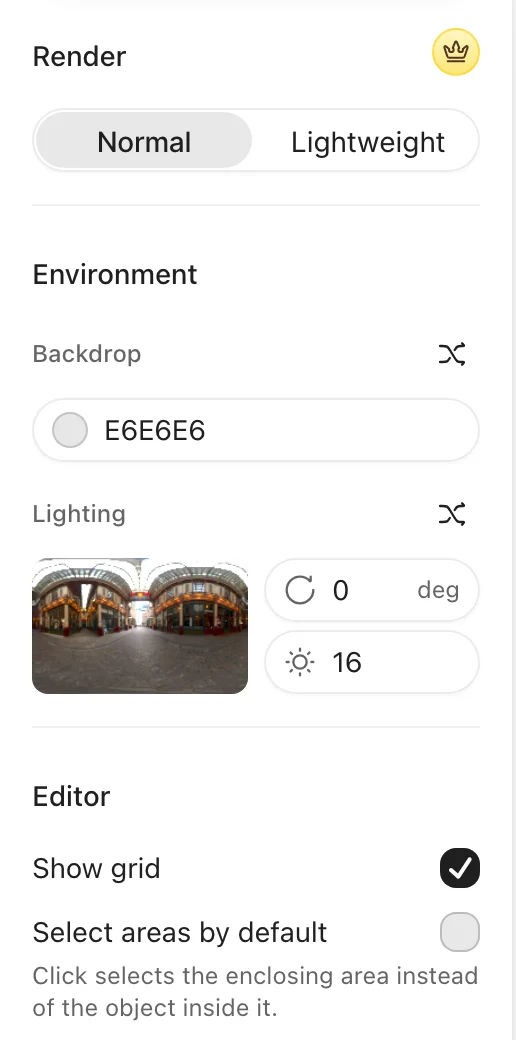
The Scene tab, with render, backdrop, lighting and editor settings.
Lightweight view
Under Render settings, choose Normal or Lightweight.
Normalshows full lighting and reflections.Lightweightturns off live lighting and reflections, so the editor runs faster on heavy scenes.
Lightweight is Pro. Switch back to Normal to check materials and lights before you export.
Cameras
Every project starts with a default camera. To add more, click Add Cameras in the Cameras section of the scene list. A new camera starts from your current view.
- Right-click a camera and choose
Activate camerato look through it, orExit camerato go back. - Select a camera to set its
Position,Look at point,PanandOrbit. - Turn on
Make camera stationaryto lock the camera so you cannot move it by accident. Show helpershows the camera in the viewport.
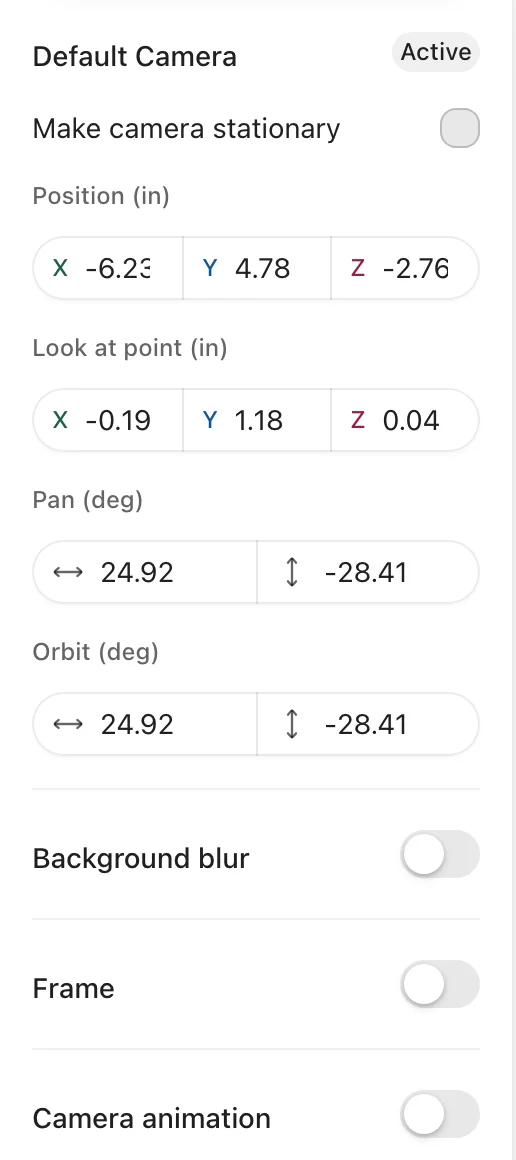
The Camera tab with the default camera selected.
Background blur
In the Camera tab of the right panel, turn on Background blur for a depth of field effect, like a real camera.
Blur strength: 0 to 100.Set focus, then click the object that should be sharp. You can also holdFand click an object.Reset focusclears the focus point.
The effect is easier to see when objects are at different distances from the camera.
Advanced camera options
Open Functions and choose Advanced camera options. This is Pro, marked experimental, and in current (v2) projects only. The Advanced Camera Properties panel has:
Enable physically-based Depth of Field: a more realistic blur. It does not work with orthographic cameras.Enable image background: shows the environment light image behind the scene.
Frame
Turn on Frame in the Camera tab to compose an image in a set aspect ratio. Pick a preset, choose Landscape or Portrait, then click Export image. The exported image has the frame's aspect ratio. In the Share menu, Download frame does the same.
You cannot use Frame and Camera animation at the same time.
Use instead
- Wrong move: adding many weak lights to brighten a scene. Why: a project has at most 15 lights, and more lights slow the scene. Right move: raise the environment
Luminancefirst, then add a few lights. - Wrong move: exporting from
Lightweightview. Why: it hides lighting and reflections, so you cannot judge the result. Right move: switch toNormalbefore you export. - Wrong move: looking for camera animation here. Why: it is on its own page. Right move: read Animation and video.
Last checked: 2026-11-10. Womp version: Womp web app, November 2026.